- Home
- Deceptions
- Solar
- Thermal Audit
- Ventilation
- Sensors
- Governance
- Environment
- Reference
- Contact
- News
1-Wire Solar Sensor Calibration
For those of you that aren't familiar with this, 1-wire is technology from Maxim (formerly Dallas Semiconductor) that allows sensors (humidity, temperature, barometric pressure, wind speed or just about anything else you can dream up) to be connected to a computer cheaply using things like telephone wire. They don't need power supplies either, they get the little (amazing little) power they need from the computer.
Solar Sensor Calibration
Purpose:
To determine a mathematical equation to convert the solar voltage values from the Hobby Board into lux as would be measured by a commercial lux meter.
Methodology:
The Hobby Boards Humidity/Temp/Solar board was pointed towards a variably cloudy sky and shielded by the glass of a standard sliding glass patio door. A reference meter (Luxmeter LX1330B) that also uses a silicon photo diode was placed beside it as close as possible with the same angle. When readings were stable, readings were taken from both units and graphed. Similar meters are available inexpensively from www.amazon.com (search for lux meter).
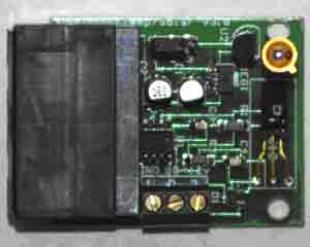
Figure 1 Humidity/Temp/Solar board

Figure 2 - Test setup
Meter specs are as follows:
“Specifications: Power: 9V x 1, Ranges: 0-200/2,000/20,000/200,000 Lux , Accuracy: ±3% ±10 digits (±5% ±10 digits as over 20,000Lux), Repeatability: ±2%, Temperature Characteristic: ±0.1%C , Photo detector type: Silicon Photo Diode with Filter , Operating temperature: 32-104 degrees F (0-40 degrees C), Sampling rate: 2-3 times per second, Battery life: 200 hours (estimate), What's in the box: Mastech Luxmeter LX1330B, Carrying case, 9V battery, User manual.”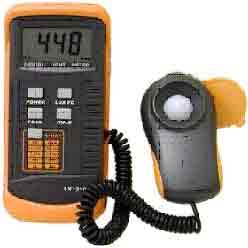
Figure 3 Lux meter image from amazon.com
Interface: A Link 45 (RS-232 serial to 1-wire) was connected to a power injector (ibuttonlink model MS-PWR) fed by a 12 volt power supply. Wiring length between Link 45 and power injector was 6 inches. Wiring length between injector and solar sensor was 6 feet, both using Cat 5 network wiring.
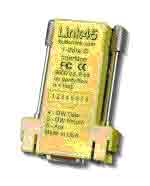
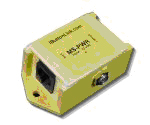
Figure 4 Link45 1-wire interface images from www.ibuttonlink.com and a power injector (not required, but used in this experiment)
Graphing notes for Microsoft Excel:
- Create a XY scatter plot.
- Choose Chart->Add Trendline (try linear)
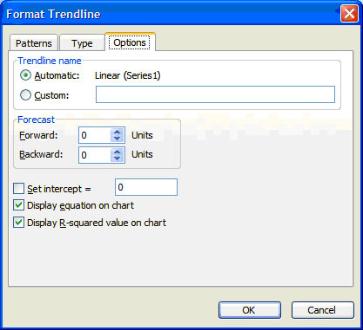
- Right click on the trendline. Select “Format Trendline” and set the following the following to get the equation to display on the chart:
Calibration in low light conditions
| Vsens | LUX meter | Outside Conditions |
| 0.01 | 7 | incandescent |
| 0.05 | 510 | overcast |
| 0.06 | 615 | overcast |
| 0.07 | 780 | overcast |
| 0.08 | 940 | overcast |
| 0.10 | 1140 | overcast |
| 0.11 | 1290 | overcast |
| 0.14 | 1640 | overcast |
| 0.16 | 1960 | overcast |
| 0.20 | 2440 | overcast |
| 0.23 | 2800 | overcast |
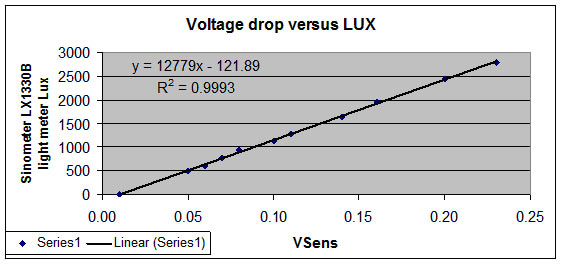
Graph of low light conditions
Analysis of low light response:
The data is tightly correlated which is to be expected because both the commercial LUX meter and the hobby board use silicon photo diodes. The hobby board goes blind below 7 lux (voltage reading is zero). This corresponds to evening lighting in a living room (perhaps with a 40 watt table lamp, or a dimmed main light and the television on, where you can still read, but with difficulty.
Calibration of bright light conditions - Full Sun, bright
| Vsen voltage | LUX on meter | Condition |
| 0.23 | 2800 | overcast |
| 0.44 | 5250 | indirect |
| 5.74 | 60000 | sun/door screen |
| 8.42 | 84800 | full sun |
| 8.56 | 86600 | full sun |
| 9.31 | 98000 | full sun |
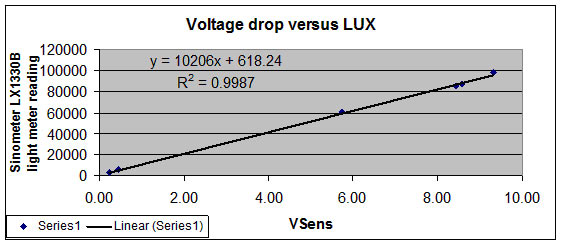
Analysis of bright light conditions
The correlation is not as close but still very good. If the bright light equation is used for a Vsens of 0.01, we get 255 lux compared with the meter reading of 7 lux. Conversely, if we use the low light equation for full sunlight (Vsens = 9.31) we get 118851 lux compared to a meter reading of 98000. Therefore, using both equations with Vsens = 0.23 volts as the switchover makes a decent model.
Note: The light sensor on this board is beside the humidity sensor. Full direct sunlight saturates the humidity sensor making it fail. A shade over the humidity sensor is required.
Conclusion:
Use the equation lux = 12779x - 121.89 where x is the measured voltage for a decent approximation. To increase accuracy when Vsens > 0.23 volts, use the equation lux = 10206x + 618.24 instead.
