
- Home
- Deceptions
- Solar
- Thermal Audit
- Ventilation
- Sensors
- Governance
- Environment
- Reference
- Contact
- News
Window Installation Standards for Newfoundland and Labrador
[Return to Policy Summary Page]
Incompetent window installation is endemic in Newfoundland and aside from wasting vast quantities of heat, results in tens of millions of damage annually as homes and public infrastructure rot. Even expensive homes are substandard. Enforceable window standards are required.
Worst Practices
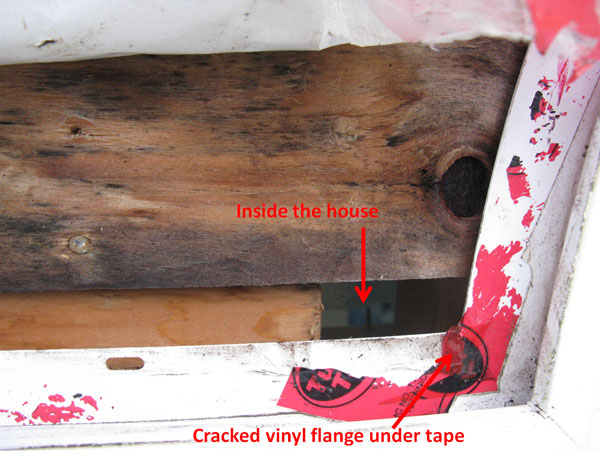
The photo below from a 2003 home constructed by ERCO Homes "the Dream Home Builder" shows a window that leaked several liters of water onto the hardwood floors when the house was about ten years old. The trim outside was removed to look for the source of the leak.
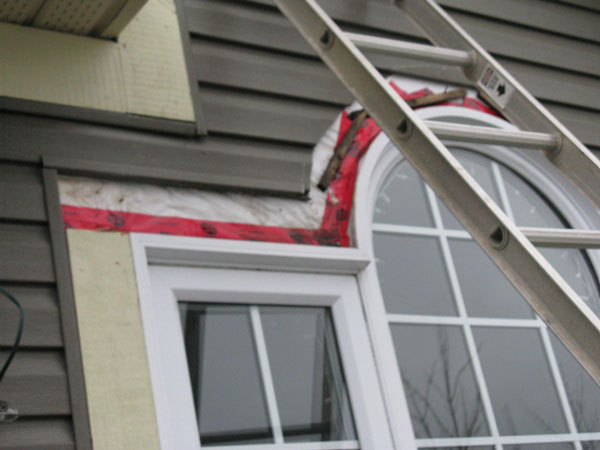
Next, a section of the inside window molding behind the curtain rods was removed so that it could be viewed from the office inside.

Notice sunlight coming through a nail hole in the red tape. This is the type of tape you use to close up cardboard boxes, except that the red glue is more permanent. Water could be seen flowing as shown by the red arrow in the next photo.

There are several bad things going on here, so lets have a look at best practices and then go back to analyze this problem.
Best Window Practices
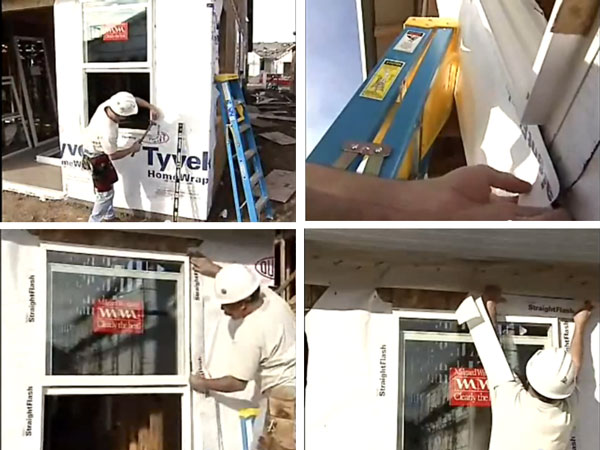
The images below show the basics of proper installation. First, the house wrap is cut and folded around the wall studs. Secondly, a sill tray is installed and the window is inserted with caulking on three sides. The sides and top are thick membrane strips (not Tuck tape) and careful attention is paid to layering.
If you are planning to fix your windows, go to Youtube and search for "best window practices" and you will find dozens of good videos. Manufacturers of windows also publish guidelines that local builders routinely ignore.
The following images are screen captures from Youtube videos with some comments.
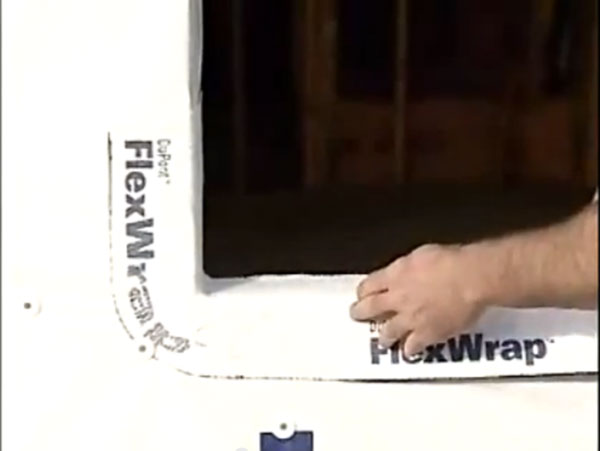
The image below shows the installation of a thick flexible membrane to make a one piece sill tray at the bottom of the window opening. The flexibility of the membrane allows for a rounded and continuous curve up the sides of the window frame. This ensures that water can't flow inside under the window or get into the wall.
This photo shows the finished result. The strip on the bottom and up the sides is continuous.
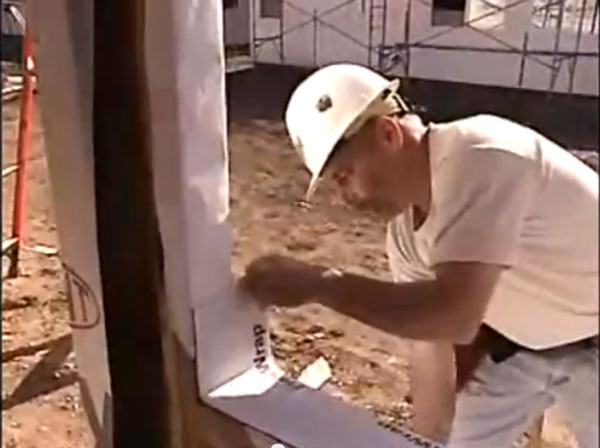
The photo shows installation of the sill tray strip from the inside of the building.
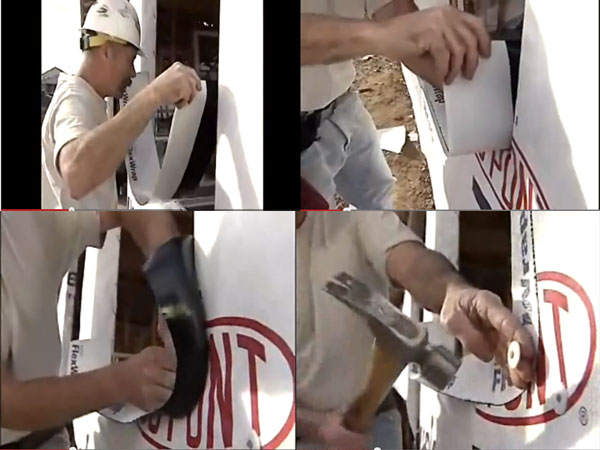
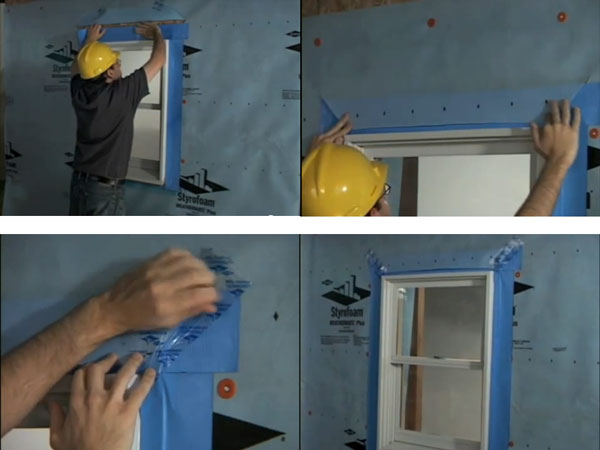
The next set of photos shows strips being laid on the outside of the frame. This is not tape, but a thick flexible membrane with adhesive. The bottom is first, followed by the sides and then the top. This way the layering is correct, much like siding overlaps.
The next photos show a different brand of materials. The yellow dotted lines show how the house wrap is cut so that the flaps can be wrapped around the sides of the window opening and stapled. One notable difference is that rather than a flexible strip as a sill tray, it is a preformed plastic tray. The tray sections are slid outwards to fill the opening, and the center junction is covered with tape. One good feature of this arrangement is that there is a lip at the back end of the tray making water flow inside the building highly unlikely.
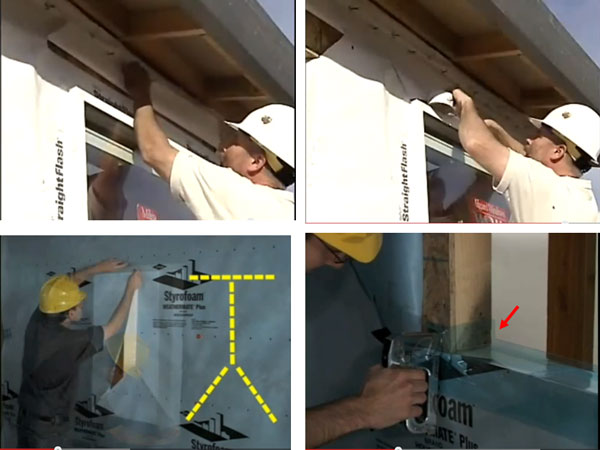
The next photos show some of the layering details. The house wrap flap at the top of the window is lifted up so that it can be be the top layer later.
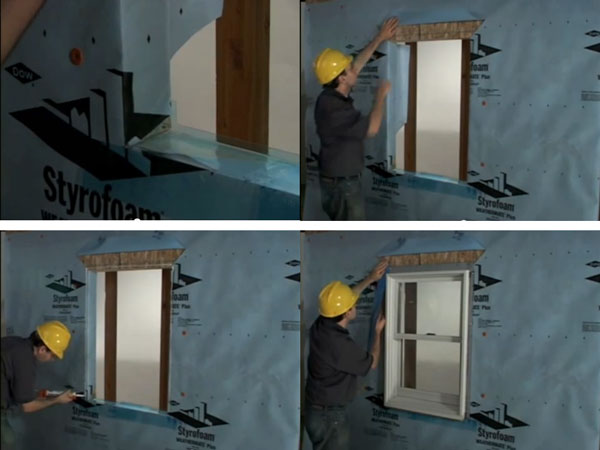
There are a few things not shown here including: Caulking the sides and top of the window before nailing it on the wall but NOT caulking the bottom. Some manufacturers insist on spacers for the bottom nails so that the bottom of the window has a gap so that water in the sill tray can drain out.
Analysis of a fancy home (retail $600,000) window installation
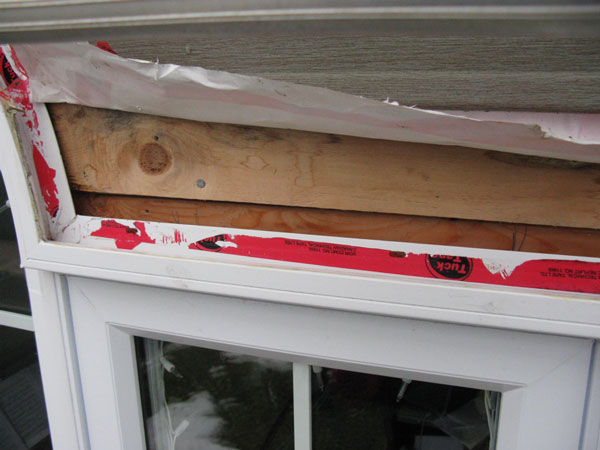
The picture below shows that the plywood opening is too large for the window. The circled hole is for nailing the window onto the side of the house. As you can see, there is just space behind it so they left the nails out. This allows the top half moon window section to flex, which then cracked the window flange. Also note that the plywood is turning black from rot. Imagine the state of these homes thirty years from now.

Note also that the house wrap has been taped to the window flange. This guarantees early failure of the seal since the tape was never intended for mechanical stresses.
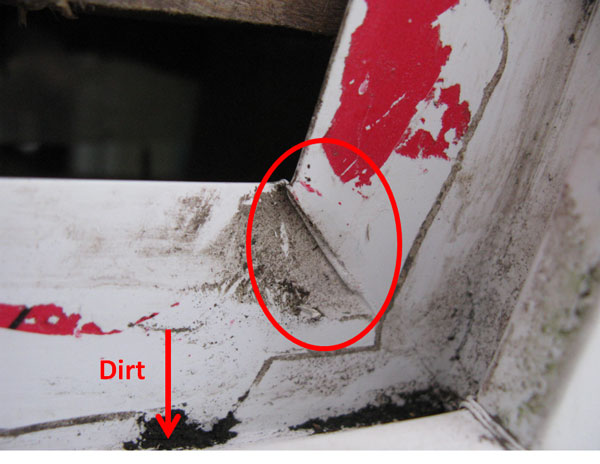
The circle below shows the cracked flange due to the flexing. The black hole looks inside the house, but the lights are off. Note the dirt in the channel. Gallons of water flow in these channels during a blowing rain storm.
The other side of the window suffered a similar fate, with an opening too large and no nails in the nailing holes. It is probably fortunate that the window didn't just pop out.
This photo shows the top left edge of the window, where water in the channel simply flows down into a slot and disappears inside the trim. This likely pools up at the bottom in heavy rains. I will remove the window someday and would be shocked if I found a sill tray of any kind. More likely, a lot of black plywood under the window.
The vertical board is pine trim, that idiots decided should be mandatory throughout the subdivision. Why homes with maintenance free vinyl windows and siding should have wooden trim that requires regular painting is unfathomable, especially since to paint the upper sections safely, you need roof anchors and fall protection equipment or scaffolding to do it safely. Few homeowners will do this safely, and it is inevitable that someone will be seriously injured falling of a light duty home ladder.
The Repair
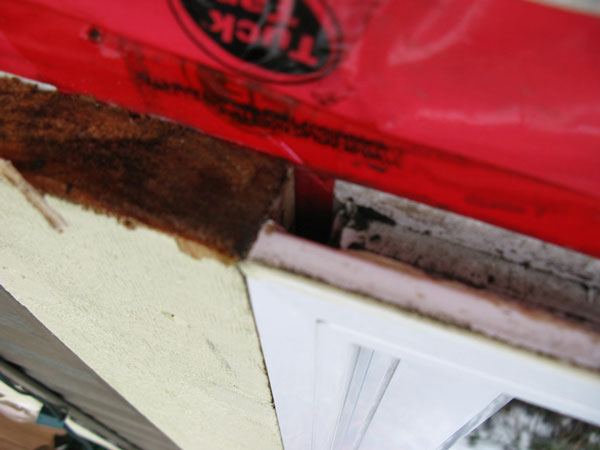
The leak was bad on a day with blowing rain and temperature of 2°C (33°F). This was no time to be removing windows, a temporary repair was made. The wet plywood was heated with a heat gun (super hair dryer) until it was hot and steaming and as dry as my patience would allow (probably 10 minutes with a heat gun). This was required because the new membrane (marked RESISTO) in the photo below should be applied at 10°C (50°F) or higher. The "Tuck Tape" is very thin, unlike the RESISO that is vastly stronger, rubbery and covered with a good adhesive. The house wrap was lifted up so that it could be layered over the new membrane.
Ideally, the window would have been completely removed and the plywood hole re sized to match the window. A sill tray would have been added and the window replaced. While the resisto seems like a good product, no flexible membrane should be spanning large air gaps.

Public Buildings
Shoddy workmanship is everywhere. The following photos are from public buildings in Newfoundland. Incompetent and sloppy workmanship is the norm, even in multi million dollar renovations.
This photo below shows that vapor barrier (6 mil clear plastic) was spread over the bottom of the window opening, and the aluminum windows just sat on top. There is lots of caulking on the outside, but caulking develops cracks in a few years and then water is free to enter.

Typically, water ends up running down both sides of the exterior sheathing and both sides turn black with mold and fugus.
